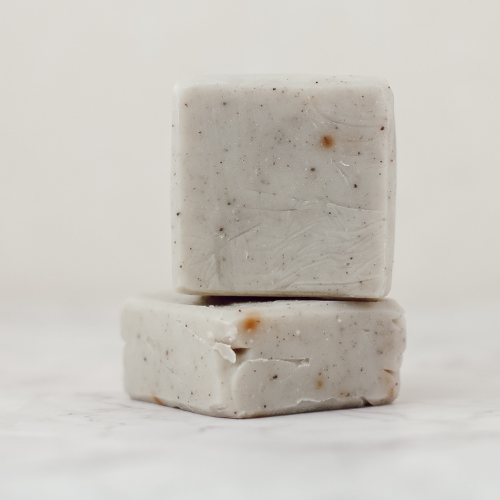
Did you grow up with shampoo in a bottle? If so, then natural shampoo bars are probably something you never thought about. Until today, you’re welcome! Today’s blog post is a little crash-course on Shampoo Bars & How To Used Them.
Natural shampoo bars are fairly simple to use once you know how to. If you are new to shampoo bars, finding the right bar and using the best technique for your hair can help in a successful transition from synthetic shampoo to natural shampoo bars.
Why Is A Shampooing Technique Important?
Our natural clay shampoo bars are superfatted and contain oils and butters to nourish your hair. It’s important to lather up really well, or you will leave areas that remain coated with the soap oils, which will; make it look “oily and heavy.”
If you are used to commercial shampoo and shampoo twice, you will have already noticed that the second wash produces a lot more lather. The first wash is mixing with the dirt and excess oil in your hair so the second wash is working on cleaner hair. The same is true for our shampoo bars.
So focus on lathering up twice to achieve a clean looking hair. Then be sure to rinse, rinse, rinse!!! Also very important, if you have long hair, pay special attention to the middle back of the hair so that you rinse all of the soap out of your hair.
Natural shampoo bars are so gentle, it may take a while to remove all of the silicones and petroleum-based products used on your hair for years but once they are gone, you will love your new way of cleaning your hair.
How to use your shampoo clay bar?
Use your hands, or a sponge to create a foamy lather, and only use the lather to wash. This method helps prevent hidden pockets of soap in your hair that can make hair feel greasy and tacky.
Be sure to saturate your hair all the way down to the roots with lots of water.
Rub the wet shampoo clay bar between your wet hands or sponge to create a good lather.
Using your fingers like a comb, smooth the lather down the length of your hair. If the lather is not foamy enough, add more water.
Gently massage the lather into the scalp and hair, as you would with a bottled shampoo.
Remember that rinsing takes longer than washing and lathering time. If your hair is long or thick, make sure to section your hair to ensure that all of the shampoo bar residues are rinsed clean.
Repeat if needed, however as your hair adjusts you may only need one round of shampoo.
Good news! You can wash your hair with natural shampoo every day if you desire! It cleans thoroughly without drying or coating your hair or scalp. Dry and style your hair as normal.

Dos & don’ts
Shampoo bars are a lot more concentrated than liquid shampoos, so avoid coating your hair with lots of residues, especially during the transition, to avoid rubbing the solid shampoo directly on your hair and scalp.
DO: Create a nice foamy lather between your hands, an exfoliating glove, a soap pouch, or a natural sponge.
DON’T: Don’t use the shampoo clay bar directly on your hair, only the lather produced.
DO: For better results, section your hair and massage each patch carefully with the shampoo foam.
DO: Use gentle motions to spread the shampoo, so you won’t create tangles.
DON’T: Don’t neglect parts of your head that are slightly more difficult to reach, such as the nape of your neck or your lower head. This is particularly important if you have long hair, don’t rush this as you may end up with mixed oily/dry patches of hair.
DO: Once you have applied the lather everywhere, rinse very carefully for one minute.
DON’T: Rush the rinsing step: make sure to remove all the excess shampoo, which would otherwise weigh your hair down once dry.
Adjust the scalps ph
Shampoo bars made with organic natural ingredients are a lot gentler in cleaning your hair than commercially made shampoos, they are however very high in pH and can cause itchiness and sensitivities. This is why we recommend you use an ACV rinse after washing your hair.
The best way to make sure you get rid of all that excess is to apply an acidic rinse. This will help re-establish your hair’s natural PH level, as well as get rid of any shampoo residue left.
Here's how to make your own Apple cider vinegar rinse for shiny hair:
Dilute 2/3 tablespoons apple cider vinegar with 250 ml (1 cup) of lukewarm water (you can add essential oils like; rosemary or peppermint to mask the vinegary smell and to give your scalp extra rejuvenating properties)
Mix and apply on your hair and scalp
An apple cider vinegar rinse is also great to tackle many other hair issues:
It’s a natural remedy to reduce dandruff
It gives hair shine and volume
It helps untangle frizzy hair
It balances the natural oil production of your scalp, so it is especially great for oily hair types
When combined with a vigorous head massage, it helps unclog hair follicles, avoiding hair loss due to the accumulation of dead skin cells or sebum.
NOTE: The transition period can range from a few days to a few weeks or even a month. It really depends on how damaged your hair is, how much residue and build-up is present. When you first begin, your hair or scalp may become oily or dry or even switch between the two extremes.
We hope you enjoyed this post and feel free to share your method with us below in the comment section.
xo Betty


